Amp Mods · Vox AC15c1 Mod Kit
Vox AC-15C1 Mod Kit Manual
Thanks for purchasing the Vox AC15-C1 Modification Kit. After these simple changes your amp should sound far better than it does now.
Optional Tools/Supplies:
- 9/16” nut driver or socket wrench.
- 1/2” nut driver or socket wrench.
- Fine point Sharpie or similar permanent marker.
- Masking Tape
Skills required:
- Basic soldering skills .
- Basic knowledge of electronics.
- The ability to follow instructions.
Parts
- Reverb Pan
- Filter Choke
- Shield Tape 60”
- 10” Teflon Wire
- 330 ohm 5 W resistor
- Small screw × 2
- Small Washer
Tools
- Temperature Controlled Soldering Iron and Solder
- Solder Sucker and or de-soldering braid
- Multi-Meter capable of reading 500V DC
- Phillips Screwdriver
- Pliers with insulated handle
- Wire Cutters
- Safety Goggles
- Alligator Leads
1
Step 1
- WARNING: Performing these modifications WILL void the warranty on your amplifier. Working on amps can be deadly if you do not take proper precautions. Follow these instructions very carefully. If you are at all unsure of your ability to perform these modifications STOP and take your amp to a professional to be modified. You can also send your amp to me for modification.
- No Warranty: This kit and the instructions included do not include any warranty of any kind. The modifications to your amplifier are at your own risk and you agree to completely hold harmless the seller of this kit against any and all claims. Tube amplifiers contain parts that operate at very high temperatures and deadly voltages. If you are not sure of your abilities to perform these modifications then do not perform them.
2
Prep the Amp
- Instructions: Follow these instructions to the letter.
- It’s a good idea to have all the parts and tools you will need laid out before starting in a well lit area.
- Unplug the Amp and put on your safety goggles.
3
Step 3
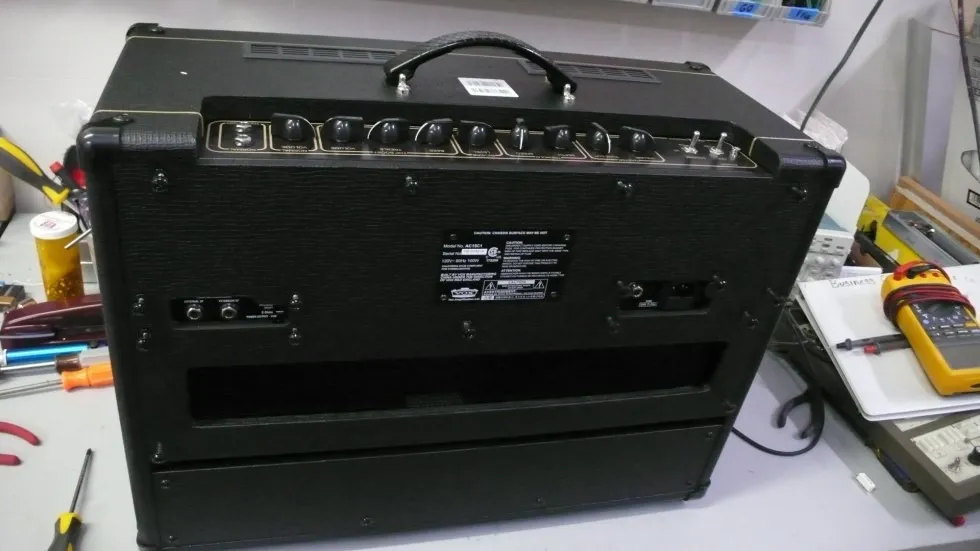
- Remove ALL 16 screws holding the back panel on the amp.
4
Step 4
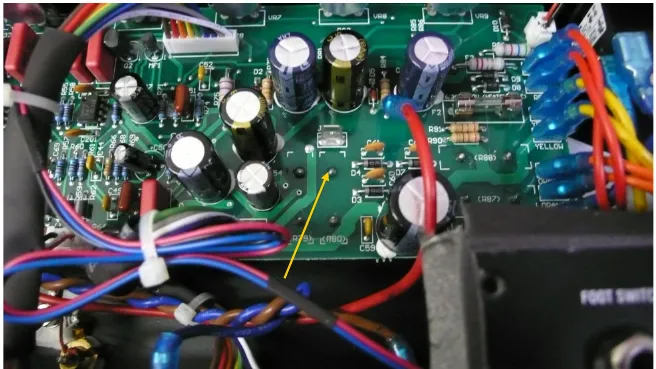
- Drain the Filter Caps: The filter caps on your amp may be drained already but you must follow these steps to insure that any deadly voltage is removed from the amp before you begin work. Clip one lead from your multi-meter to ground on the chassis ground and with your meter set to Volts DC, measure from the point indicated by the arrow in the picture. If the voltage is above 10 volts you must drain the filter caps.
5
Step 5
- Using an alligator clip, attach one side of the 330 ohm power resistor to the chassis ground and using insulated pliers to hold the 330 ohm power resistor, touch one lead of the resistor to the point indicated in the photo above. Leave the leads in contact with the power resistor for 30 seconds and measure again. Keep repeating this step until the voltage reads below 10V.
- Capacitors can recharge even when the amp is not plugged in!!! After the filter caps are drained, take an alligator lead and clip one end to chassis ground and remove the red lead just above the place where you measured the voltage. Clip the other side of that alligator lead to that spade. This will prevent the filter caps from recharging.
6
Step 6
- Once the filter caps are drained you can remove the rest of the chassis by removing the screws on the side and disconnecting any leads from the chassis (reverb, power, speaker). It will be necessary to remove the chassis to install the choke.
7
Step 7
- If you are careful with your soldering iron you will be able to perform all these mods without removing the circuit board. To accomplish this you will most likely need both a solder sucker and de-soldering braid.
8
Step 8
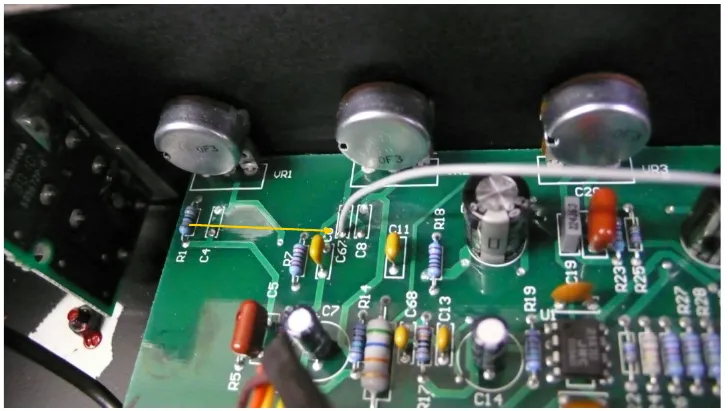
- We are going to be removing 3 capacitors from the circuit board. They are C4, C8 and C67. You can just clip C4 and C8, as those holes are not going to be used for anything. When you remove C67 clip the side that is closest to the pots, then carefully heat the solder pad indicated with the arrow while gently pulling the component out of the hole. Then clean up the hole using de-soldering braid and/or the solder sucker.
9
Step 9
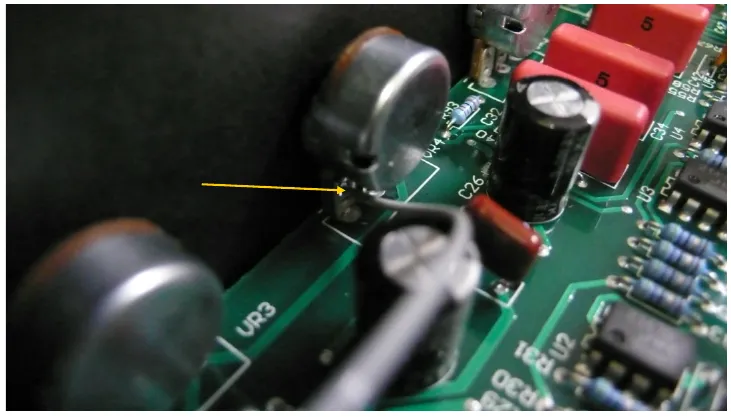
- At the bass pot there is a small hole right where the arrow (in the photo to the Right) is pointing. Insert one end of the 10” wire into the hole and carefully solder it in place. Take the other end of the wire and insert it into C67 as indicated in the photo above. Because the circuit board is double sided, you can solder directly from the top side of the board.
10
Step 10
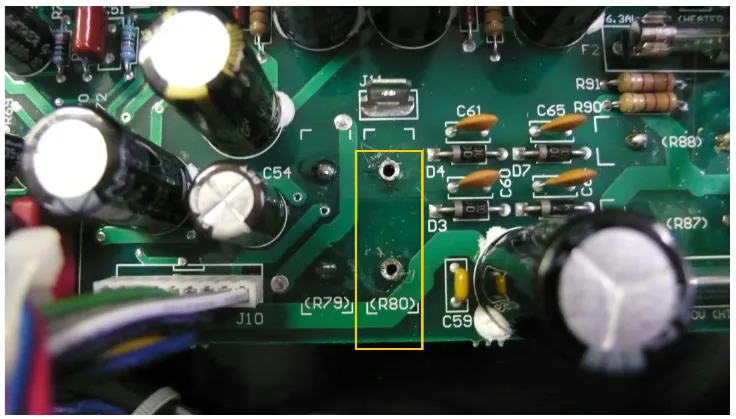
- Remove R80 (it’s the same spot you measured the voltage on the circuit board). It would not be a bad idea to make sure the caps are still drained at this point. Using a solder sucker and solder braid it is easy to remove the component and it should drop when the solder is removed as indicated in the photo. This is where we will solder in the filter choke.
11
Step 11
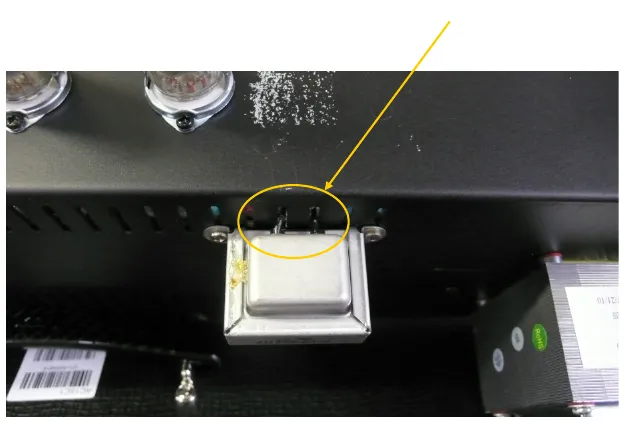
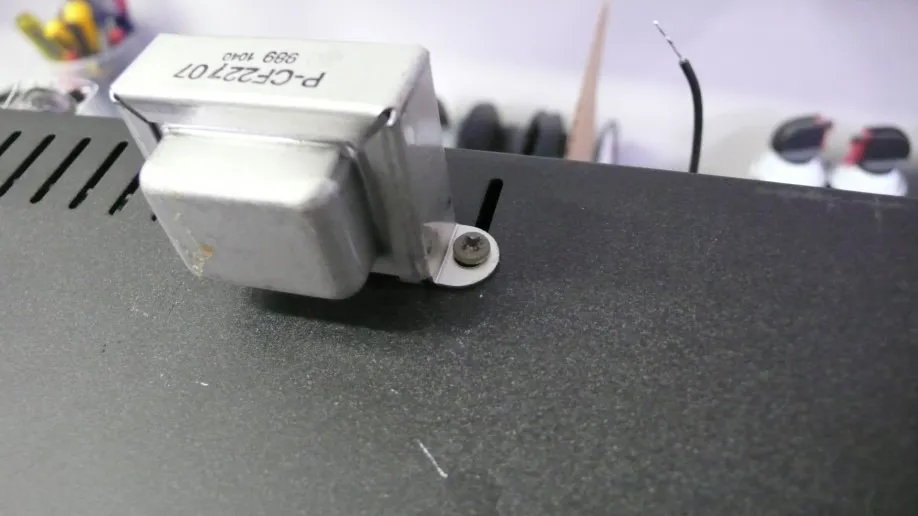
- Flip the chassis over and install the filter choke into the grill of the chassis as shown with the supplied screws and washers. Run the leads from the choke through the grill as indicated.
12
Step 12
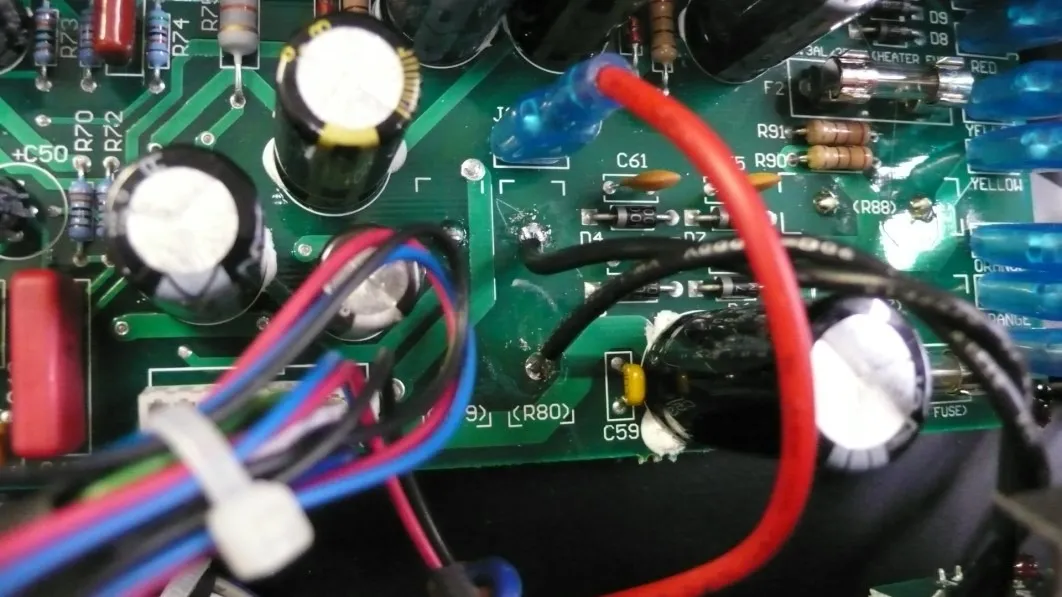
- Install the leads from the choke where the resistor was previously removed. You can solder these in from the top side of the board as well.
13
Step 13
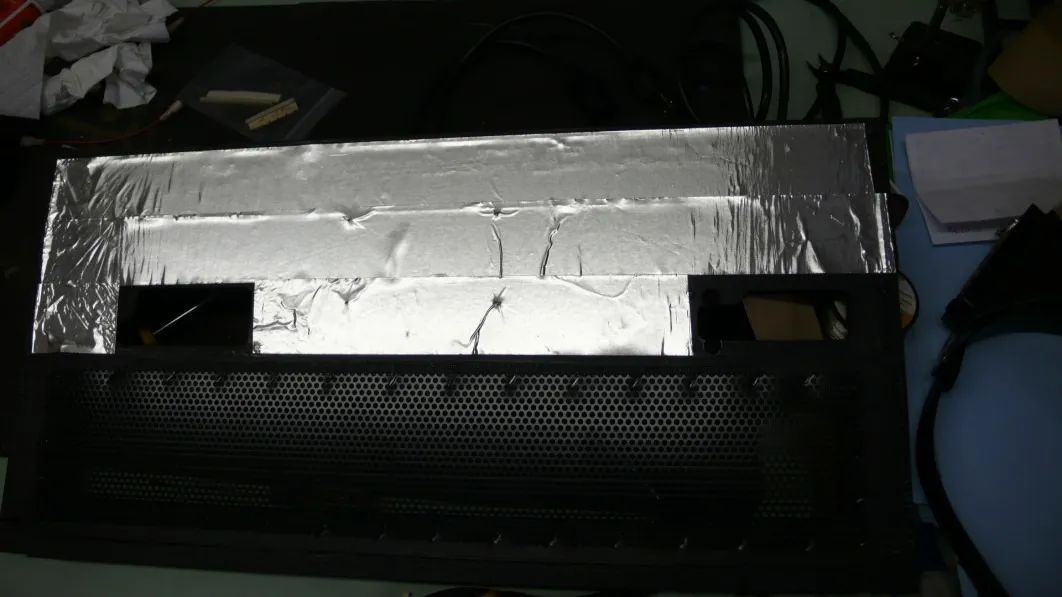
- Install the shielding tape on the back panel as indicated. The tape cuts easily with scissors or an exacto knife.
14
Step 14
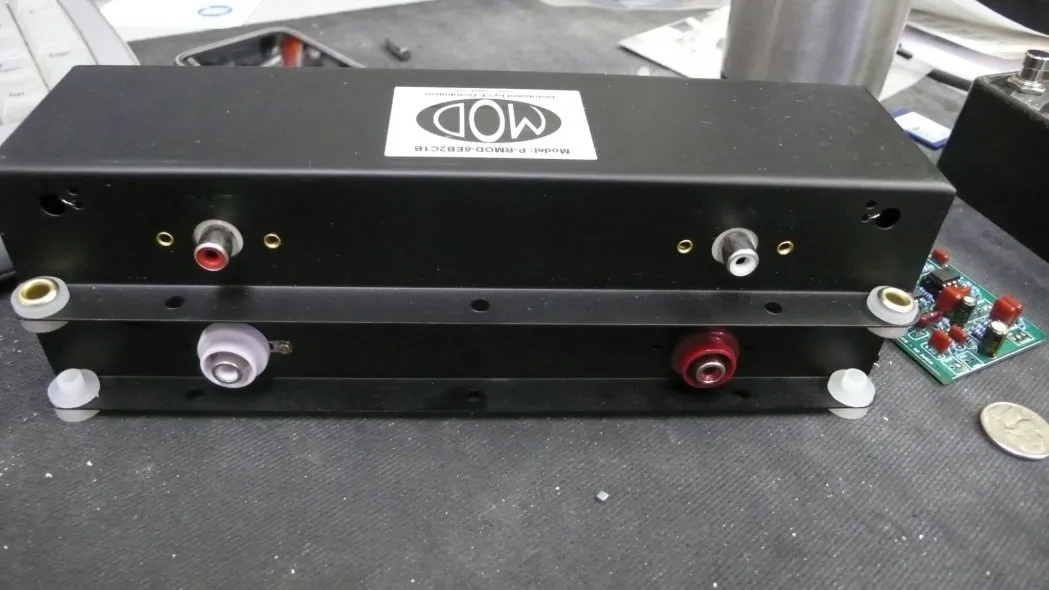
- Swap out the reverb tank. Note that the old tank indicates white for output and red for input. This is reversed on the new tank, so just make sure that the old lead for reverb input goes to the new jack for reverb input. The same goes for the output.
Finishing up
Double check all your work and put the amp back together in the same order you took it apart and you will be ready to rock.